Nutanix Foundation 1.2.1 – part 2
In first part of Nutanix Foundation series I blogged out how to configure and prepare your Nutanix Foundation VM for deployment on Nutanix blocks.
Prepare Nutanix block for provisioning.
Connect each Nutanix block by at least single cord to network switch. In a backplane you will find 3 X RJ45 sockets – plug cable into middle one. It is shared port between IPMI module and SuperMicro server.
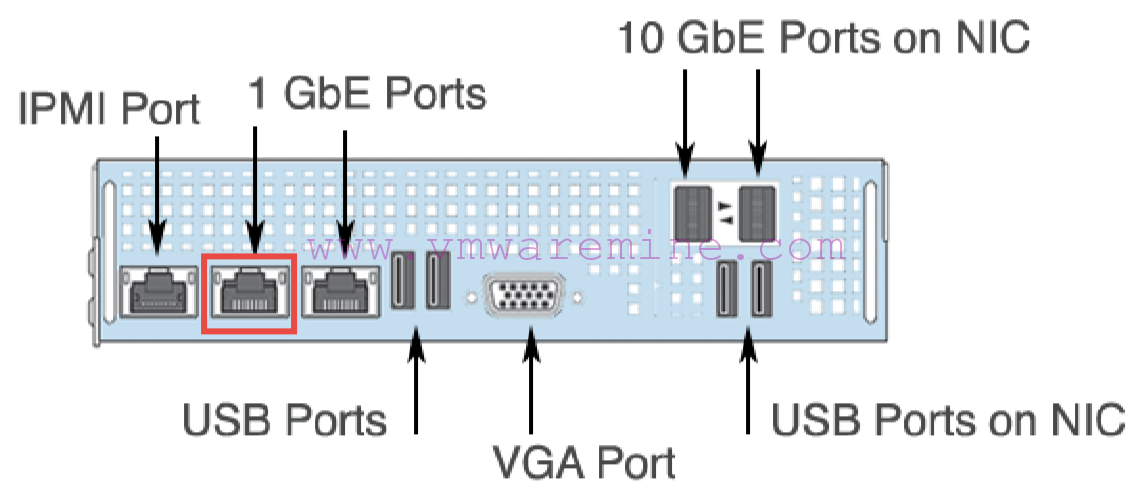
Nutanix block backplane – pic. from Nutanix doc.
Start Nutanix Foundation VM and go to Nutanix Foundation portal web page – no credentials are required http://Nutanix_foundation_IP:8000/gui/index.html . You should end up on webpage where you can provide and configure different cluster parameters such as IP, gateways, DNS, NTP.
Working with Nutanix foundation.
[box type=”warning”] NOTE: before you start make sure IPv6 is enabled on PC which is used to host Nutanix Foundation VM.[/box]
When you open Nutanix Foundation portal for a first time it should automatically discover empty Nutanix nodes over IPv6. Nutanix Foundation portal is divided by three sections:
- Set the global configuration for the blocks
- Configure blocks and nodes.
- Choose the ISO images that you want to install.
First section is where you define global settings for your deployment like:
- netmasks for IPMI, CVM, hypervisor
- gateways for IPMI, CVM, hypervisor
- IPMI username and password, default IPMI username is: ADMIN and password: ADMIN
- hypervisor DNS
- CVM memory size
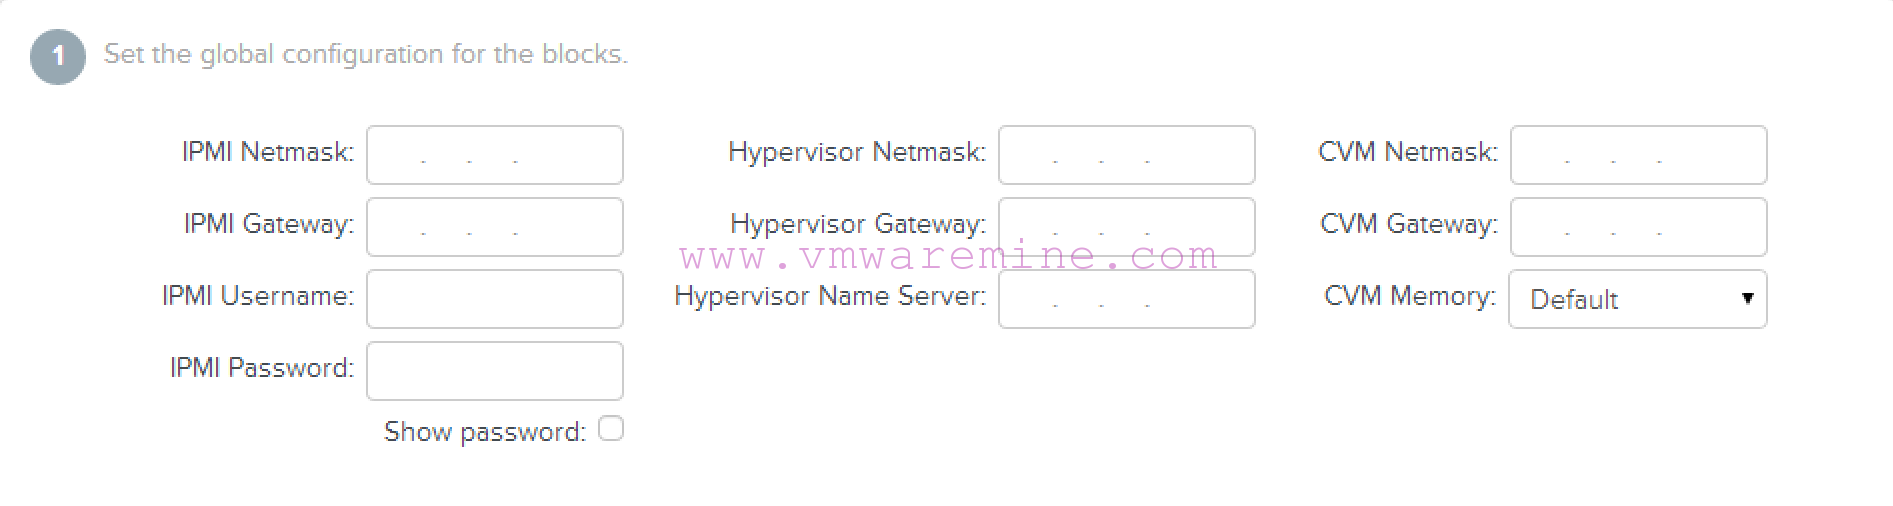
Nutanix Foundation portal – global settings
Second section is where you configure block, nodes and cluster Multi-homing: If you are using a flat switch (no routing tables) for installation, check the Multi-Homing box. The purpose of the multi-homing feature is to allow the Foundation VM to configure final production IP addresses for IPMI, hypervisor, and Controller VM while using an unmanaged switch. [box type=”warning”] NOTE: If this box is not checked, Foundation requires that either all addresses are on the same subnet or that the configured IPMI, hypervisor, and Controller VM IP addresses are routable. [/box]

Nutanix Foundation – second section
Create a cluster Using Nutanix Foundation you can automatically create NOS cluster after deployment. In this section provide:
- cluster name
- external IP (virtual IP), you can reach out one of the Controller VM in the cluster and NOS cluster PrismUI
- max redundancy factor – setting it on 2 means cluster can tolerate up to one node or disk failure, setting it on 3 can be enabled only after cluster is created and cluster need to have at least 5 nodes.
[box type=”info”] NOTE: Redundancy factor 3 is available only with Nutanix OS 4.0 and later[/box] Add metal nodes. Nutanix Foundation can image nodes without any NOS software installed. Enter number of blocks and nodes per block. When you deploy bare metal block MAC address of IPMI interface is required for provisioning. MAC address can be found on the back of Nutanix block, just below the middle 1Gbps plug.
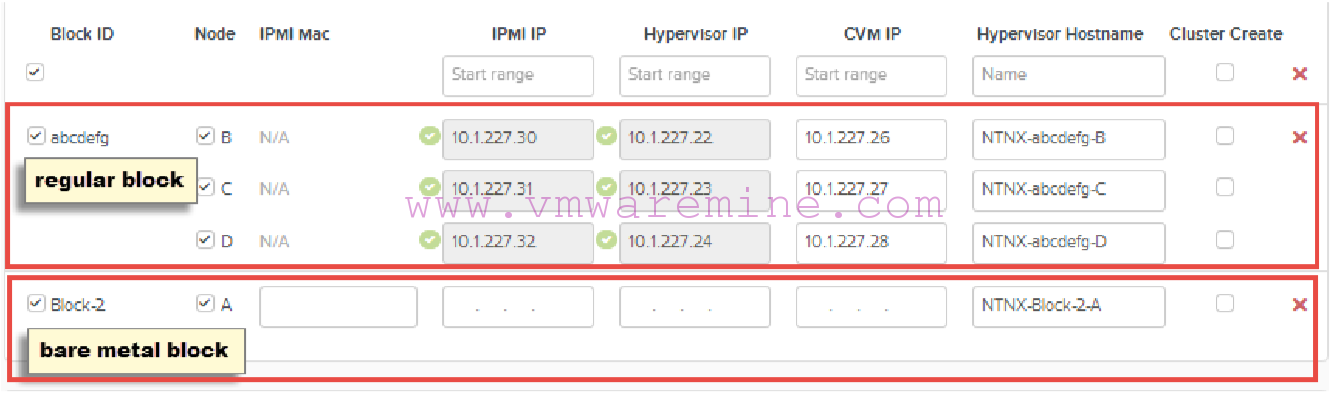
Nutanix Foundation – bare metal and standard block – pic from Nutanix docs
In the lower middle section of the screen, configure the nodes as follows: This section displays information about the discovered nodes. The size of this section varies and can be quite large when many blocks are discovered. It includes columns for the block ID, node, IPMI Mac address, IPMI IP address, hypervisor IP address, CVM IP address, and hypervisor host name. A section is displayed for each discovered block with lines for each node in that block. If you added bare metal blocks in the previous step, those blocks also appear Provide all required information a move to next step. On the bottom section do the following, In the Phoenix ISO image field, select ISO image you’ve downloaded previously from the pull-down list. In the Hypervisor ISO image choose hypervisor ISO image from drop-down list. Verify one more time all information provided and click Run Installation button. Depending on number of nodes and hypervisor type installation might take up to one hour. You can follow-up on installation progress by staying on Nutanix Foundation portal and refresh log window from time to time. And you are DONE, three nodes Nutanix OS cluster provisioned and configured.
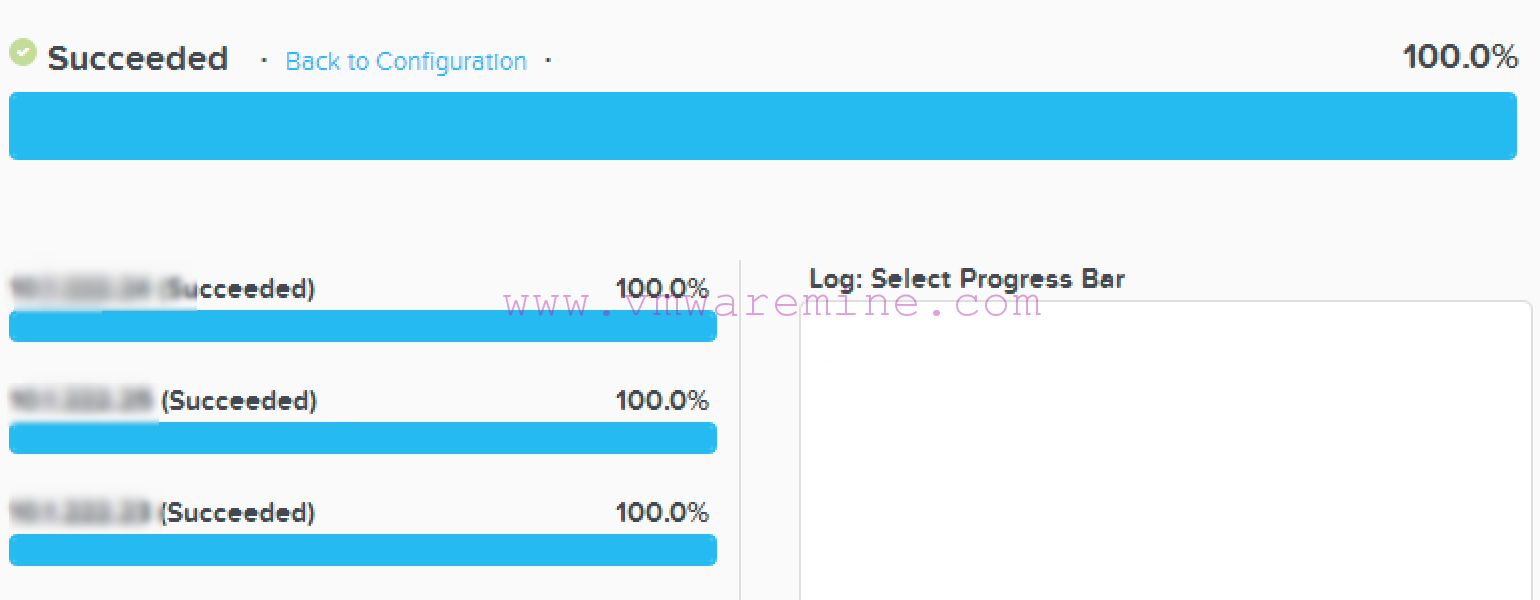
Deployment successful
From a log below can notice installation started at 04:16:46 local time and finished at 04:46:01 – provision, configure 3 nodes with ESXi 5.5 took about 30 minutes
20140728 041646: Powering up node
20140728 041706: Attaching virtual media: /home/nutanix/foundation/tmp/fuse/esx_node_0.iso
20140728 041742: Checking virtual media: /home/nutanix/foundation/tmp/fuse/esx_node_0.iso
20140728 041742: >vmwa status
Device 1: None
Device 2: ISO File [/home/nutanix/foundation/tmp/fuse/esx_node_0.iso]

10.1.222.26 X9DRT-HF+ (S0/G0,108w) 04:17 SIM(WA)SIM(WA)
20140728 041742: Resetting node
20140728 041742: Powering up node
20140728 042341: esx_installing
20140728 043023: esx_rebooting
20140728 043023: Exiting SMCIPMITool
.
.
.
.
0140728 044549: INFO: Setting vSwitch NIC failover policy for vswitch 'vSwitch0' to: active_nics=['vmnic2'], standby_nics=['vmnic3', 'vmnic0', 'vmnic1']
20140728 044552: INFO: Adding NIC vmnic2 to activeNic policy
20140728 044552: INFO: Adding NIC vmnic3 to standbyNic policy
20140728 044552: INFO: Adding NIC vmnic0 to standbyNic policy
20140728 044552: INFO: Adding NIC vmnic1 to standbyNic policy
20140728 044554: INFO: Allowing service 'sshClient' in host firewall
20140728 044555: INFO: Allowing service 'nfsClient' in host firewall
20140728 044556: INFO: Changing the value of 'Misc.APDHandlingEnable' from '1' to '0'
20140728 044558: INFO: Changing the value of 'NFS.HeartbeatTimeout' from '5' to '30'
20140728 044559: INFO: Changing the value of 'NFS.MaxVolumes' from '8' to '64'
20140728 044600: INFO: Changing the value of 'Net.TcpipHeapSize' from '0' to '32'
20140728 044601: INFO: Changing the value of 'Net.TcpipHeapMax' from '256' to '128'
See my Nutanix Foundation part 3 for post installation steps.


Thanks for the foundation articles, They are really helpful. I can however not find part3 regarding post installation steps.
This is a GREAT set of documents. This should be mandatory reading for anyone interested in Nutanix