Runecast Analyzer is making quite a buzz in the virtualization community for a while now. It is definitely a product worth checking out. Here is a quick product review.
Runecast Analyzer is a proactive analytics product for VMware that automates the publicly available knowledge to discover risks in your VMware environment. The knowledge sources are:
- the VMware Knowledge Base
- VMware Security Hardening Guides
- DISA-STIG6 guidelines
- various Best Practices documents
- Social Media (various blog articles)
At the time of this writing Runecast Analyzer supports vSphere and vSAN and seems like NSX integration is coming soon.
If you think about it, we mainly use all that information reactively – only when a problem happens and things have gone south. Runecast alerts you of the conditions that can cause an issue in your environment in advance, so you can mitigate them and avoid the problem from happening on the first place.
Runecast Analyzer deploys as a per-configured 1.1GB OVA you can download from runecast.biz. It is a fully on-premises solution, so it can even work without any Internet connection, which is great for secure environments. Considering that the public knowledge is evolving continuously, you need to update your Runecast Analyzer appliance somehow, so you have a choice of online and offline updates.
The deployment is pretty straight-forward – you just need to set the IP and select the VM size – Small, Medium or Large, depending on the size of the environment you will be analyzing. In total you will need 2 to 8 vCPUs, 4 to 32 GB of vRAM and 90 GB of storage. More details in the Runecast User Guide: https://www.runecast.biz/RunecastUserGuide.pdf
Once the deployment is complete, you can navigate to the Runecast Web Interface: https://applianceIP and login with the default user/pass:
user: rcuser
password: Runecast!
Next step is to connect to one or more vCenters. Make sure you use at least Read-Only user on vCenter level for each vCenter connection. There are a few more privileges you need to assign to the vCenter user if you want to use 100% of Runecast’s functionality, as described in the Runecast User Guide. Click Analyze Now to trigger the initial configuration analysis and review the results on the main dashboard.
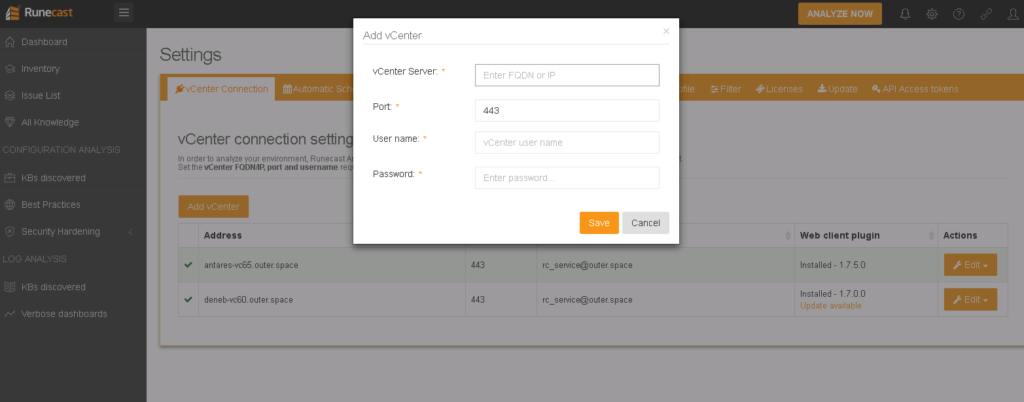
Add a vCenter
Runecast performs both configuration and log analysis, so it is important to set the Runecast appliance IP as ESXi syslog destination. If you already have some syslog server, you can just add the Runecast IP as a secondary destination. You can actually do that also through the Runecast interface – navigate to Settings -> Log Analysis and click the check boxes next to the ESXi hosts you want to configure.
Time to return to the main dashboard and see the high-level overview of the state of your environment.
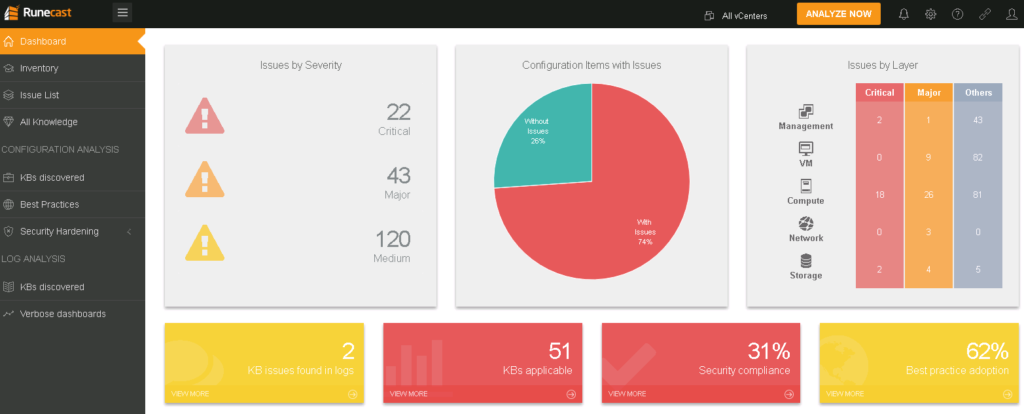
main dashboard
You can quickly see where to focus your attention – you would usually start from all Critical and Major issues. The whole dashboard is interactive, so if you click on any of the items, you will be taken to a table with issue details.
Here is the expanded view of a Critical potential issue coming from a KB. The Details tab describes the potential issue, root cause and resolution:
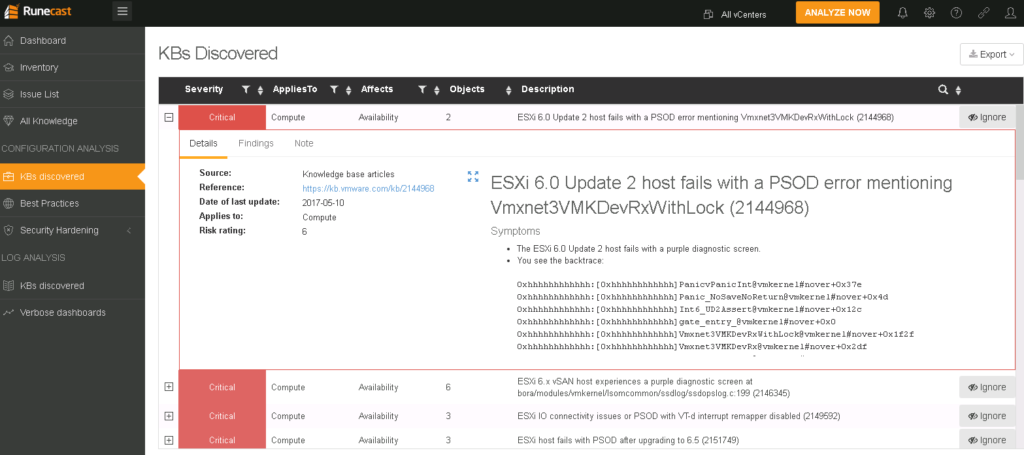
KB details
The Finding tab gives you the specific configuration items and conditions that triggered this as a potential risk.
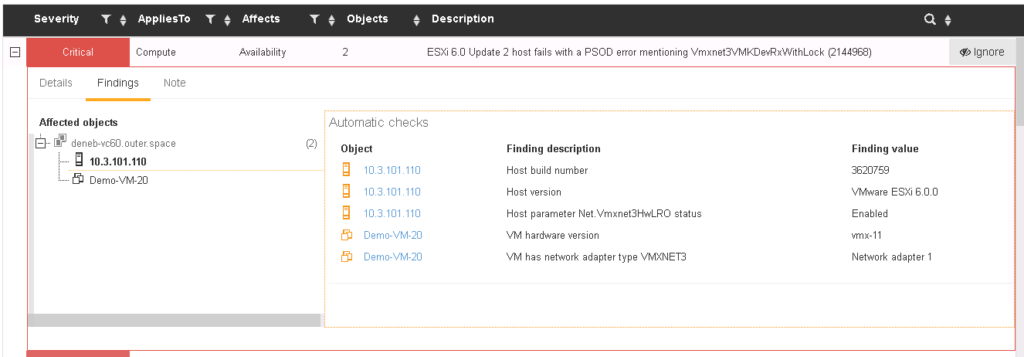
KB Findings
Some issues are reported only when a group of interdependent vSphere objects correspond to specific conditions. Like the one shown above – the VM with hardware version 11 and VMXNET3 driver runs on a host with VMXNET3 Hardware LRO set to Enabled and has a specific version and build number. This ticks all the boxes mentioned in the KB and therefore it’s reported as a risk.
In case an issue was detected in the logs, you will get a similar view. Under Findings, you can see the exact log entries that are related to the reported problem:
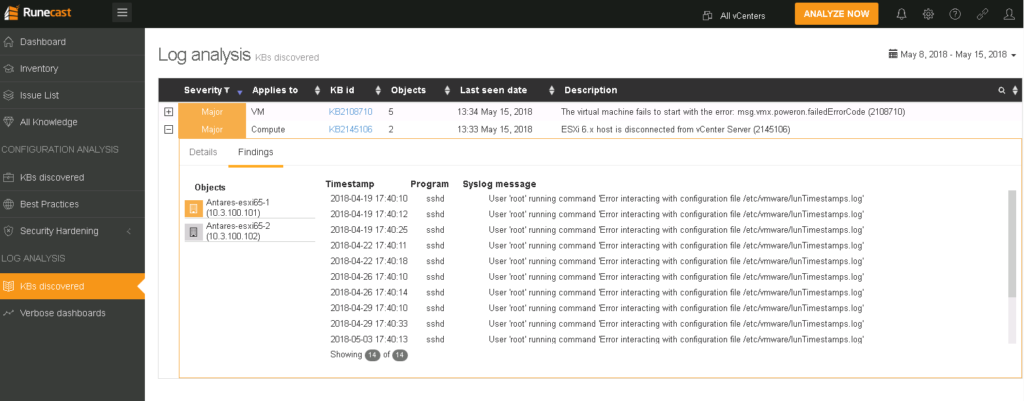
Runecast Log Analysis
Speaking of log issues, the KB discovered page under LOG ANALYSIS will show you all detected issues for a specified time period. The results here depend on the known issues documented in the VMware Knowledge Base. So in case you are experiencing a problem that is not already known and documented, it is worth checking the Verbose dashboards page.
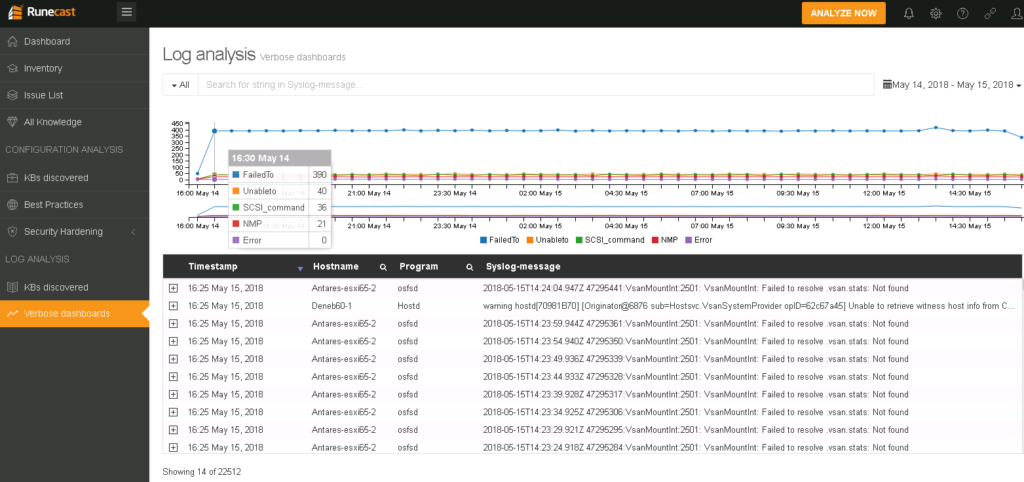
Verbose dashboards
Verbose dashboards present you with a chart and a table displaying log entries that contain important keywords, such as FailedTo, UnableTo, NMP and so on. The idea here is that you can notice some spikes of similar log entries indicating a problem and quickly navigate to the root cause.
Now, let’s go back to CONFIGURATION ANALYSIS. One feature that can prove to be extremely valuable to many organizations is the Security Hardening. Runecast performs automated security health checks based on the VMware Security Hardening Guides and the DISA-STIG6 guidelines. DISA-STIG is even more stringent than our well know Security Hardening Guides. This compliance standards is followed by US Federal Agencies. So if in your organization there is an emphasis on security, this analysis will help you a lot. I like that you can also customize the checks by disabling some of them. Click the Ignore button next to each check – whether it’s a KB, Security or Best Practice, to filter it out for part of your environment.
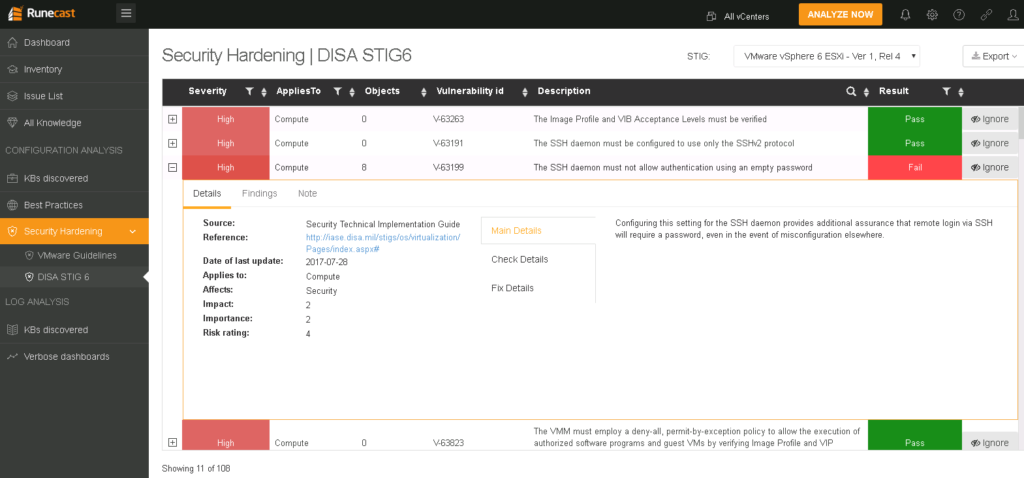
DISA-STIG6
Runecast offers a nice vSphere Web Client plugin, so all issues discovered by Runecast can be seen directly in your Web Client – whether you use the Flash or HTML5 version.
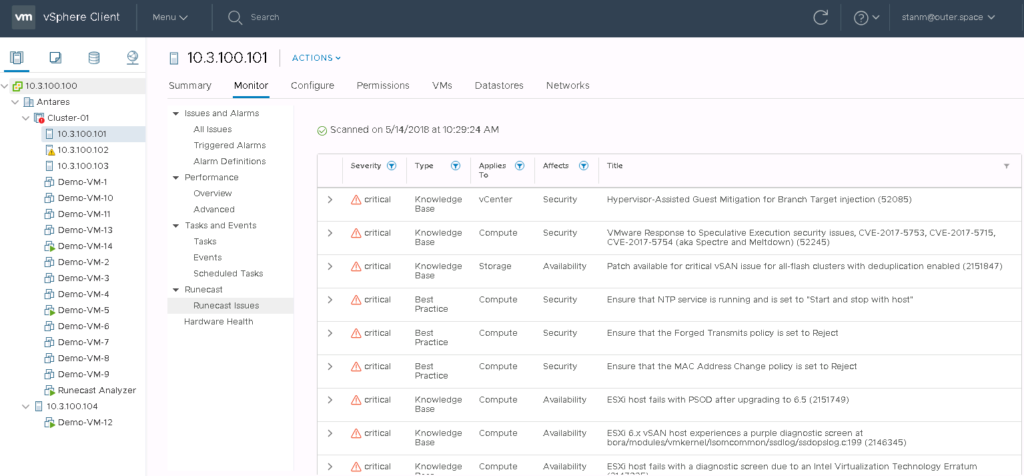
vSphere Web Client plugin
You can also leverage the RESTful API or the Runecast vRO plugin for further integrations.
The product is obviously developed by admins for admins – its easy of use and evident value in day to day operations is refreshing. As mentioned earlier, it’s pretty easy to download and try it, but if you just want to play with the interface, you can check out the Live Demo on runecast.biz.
Runecast offers unique value with its KB correlation and compliance checks which makes it a must-have for any VMware environment.
