After a year with my Sony Xperia Z1 Compact I decided to replace Sony Android build with CyanogenMod 12.1 Amami. Running my phone on factory build Android for almost a year give me good overview over advantages (stamina mode, few good apps from Sony) and disadvantages (lack of customization, plenty of useless apps pre-installed).
However, the reason behind this blog post (my blog is about virtualization and cloud computing not Android or mobile devices) is to make life easier for people who would like to flash their phones. On internet there many different guides and How-To’s. Most of them are outdated, like the one on official CyanogenMod wiki page, or non-English language, or really complicated. The one, described in my two blog posts series, is the easiest one. At least for me.
[box] NOTE: You are doing it at your own risk, Make sure you have backup. For Sony devices you might want to create DRM keys backup first before you start.[/box]
Before we start to install CyanogenMod 12 on Sony Xperia Z1 Compact you should prepare software and your computer.
Download Android SDK and install it on computer. In fact, whole package is not need, only platform tools are needed, ADB and FASTBOOT.
Download CyanogenMod 12.1 amami for Sony Xperia Z1C. For Sony Xperia Z1 Compact, CyanogenMod build name is Amami.
Download gapps – if you like your google apps (Google play, gmail and few more) you can install them too on CyanogenMod 12.
Disable drivers signature on Windows 8, 8.1 or 10 – flashtools drivers are not digitally signed, you have to disable drivers signature verification on Windows before drivers installation.
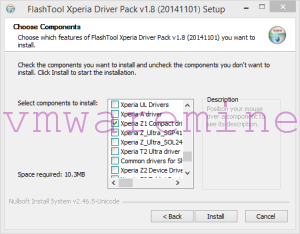
Download and install flashtools (Windows only). From flashtools package we need only driver package. Driver packed in located in \Flashtool\drivers . Install package, choose drivers for Sonyy Xperia Z1.


