For migration from VMware vSphere to Nutanix AHV, please use Nutanix Move (Free V2V tool, developed by Nutanix)
Finally I have found some time to proceed with my migration blog series. Today, fast an easy way to migrate Windows 2012R2 from Hyper-V to AHV. In below scenario source environment is Microsoft Hyper-V 2012R2 and target is AHV 20160217 and ABS 4.6.
Pre-Requisites
- Acropolis Base Software 4.7.0 or newer
- Acropolis Hypervisor aka AHV 20160601.20
- The same network segments available on AHV as on Hyper-V system.
- mounted Nutanix Acropolis container as SMB storage to Hyper-V cluster
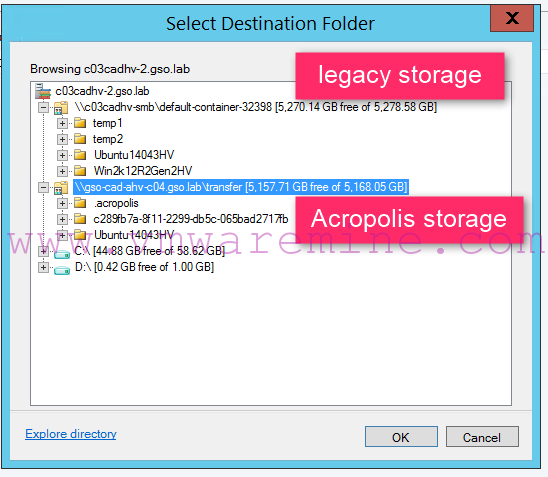
Acropolis storage mount to Hyper-V cluster
- Hyper-V Generation 1 VM
- Remvoe all snapshots from VM
NOTE: For Hyper-V generation 2 VM migration procedure to Nutanix AHV – see my blog Migrate Hyper-V Generation 2 VM to Nutanix AHV
Step #1 – prepare source virtual machine for migration
As we will be doing cross-hypervisor migration (from Hyper-V to AHV), source virtual machine needs drivers to be installed on target platform. Download latest version of Nutanix VM Mobility 1.0.1 for Windows from portal.nutanix.com and install on source VM. Migrate VM VHD files to Acropolis container – use Migrate Storage feature from SCVMM. Shutdown VM after installation.
Step #2 – upload VHD file to image service.
There are two way of uploading image to image service. Using PrismUI (see Step 2.1 or command line see step 2.2)
Step #2.1 – upload disk using PrismUI
Use Nutanix image service and upload VHD file from Hyper-V. Log in to Prism UI on target system and from action menu (top right corner) choose Configure image services. Click on Upload Image. Provide name for new image, in disk type choose DISK and browse to path to VHD of source VM
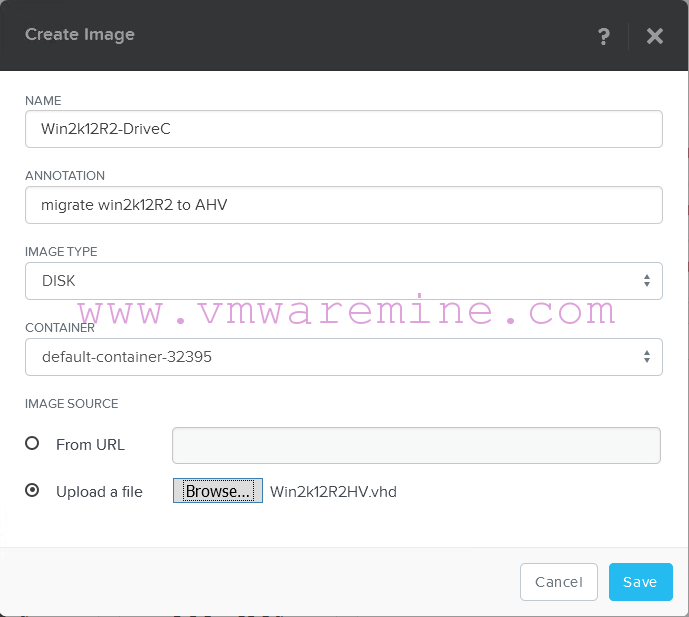
Create new image from VHD file
Depending on disk\data size, network speed in might take a time to upload VHD into AHV platform. Once is done you can proceed to step #3.
NOTE: if you have multiple disks to upload, start several parallel sessions and create image from all.
Step #2.2 – create image using command line (acli)
To do this you have to migrate VM disks off current storage to Nutanix AHV container and run few command from acli to create image.
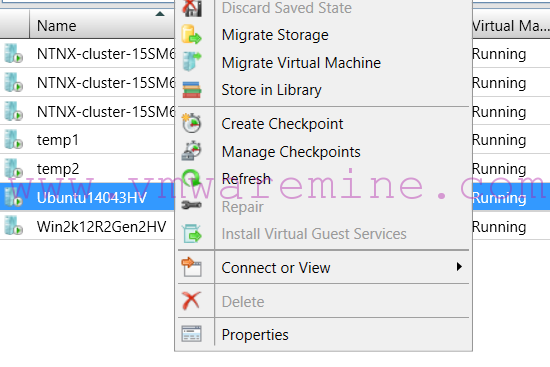
Migrate storage to Nutanix AHV
When storage migration is done, power VM down and log in to CVM via SSH. Run below commands to create image from disk.
<acropolis> image.create Win2k12R2HV-OS source_url=nfs://127.0.0.1/transfer/Win2k12R2Gen2HV/Win2k12R2Gen2HV_disk_1.vhd wait=true image_type=kDiskImage container=GSO-MGT-NFS01
Success
<acropolis>
Step #3 – Create VM
From Prism UI, create new VM. In disk section, add all disks in right order (C drive as first and so on) with BUS TYPE – SCSI and OPERATION – Clone from image service.
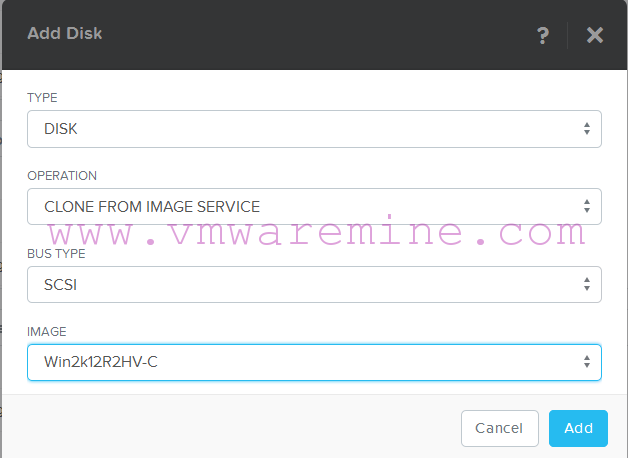
Add disk to VM in Nutanix AHV
Do not forget to add network adapter to virtual machine configuration and make sure it is connected to the same network like it was on Hyper-V
All right – virtual machine on Acropolis hypervisor is ready to be power on. Start VM and lunch VM console. Log in to system and verify disk layout, IP configuration and applications. If all looks good you can go to Image service and remove images. For detailed instruction, see my video below.
HAPPY MIGRATIONS !!!!
CHANGE LOG:
- 26’th Sep 2016 – updated AOS and AHV requirements


When should one opt for Creating an Image (out of vhdx file) vis a vis Converting vhdx to .raw? Is there any advantage of one approach over the other?
Where can I download the Nutanix VM Mobility software? I tried looking for it through portal.nutanix.com but nothing came up. Thanks
Thanks for the great tutorial! When I do this and power on my VM, I get an error stating that no operating system can be found. I have the VirtIO drivers installed and everything else. Any idea?