In the 3’rd part of my Nutanix DR orchestration series, you can read about failover test and test validation and how to configure and execute both.
Before you start, have a look at:
Validate recovery plan
Validation of a Recovery Plan is a new operation that performs a quick and superficial check of whether the Recovery Plan is expected to failover successfully. The validate operation does an inspection-only check on the presence of the following resources:
-
-
- Required snapshots
-
- Available system resources (CPU, memory)
- Required virtual networks
-
Browse to recovery plans and click on recovery plan you want to validate. From Action click, Validate, choose a Primary location and Recovery location
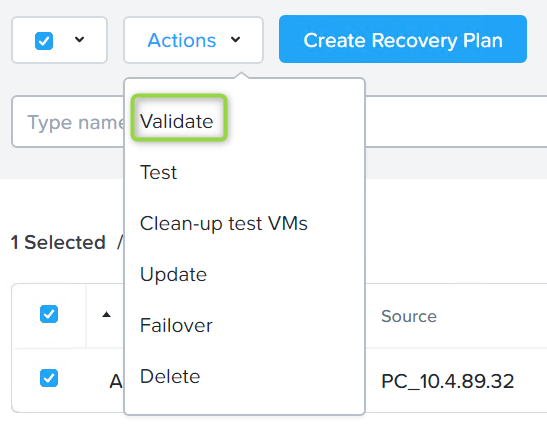
After a few seconds, you should get a nice, detailed report with validation results.
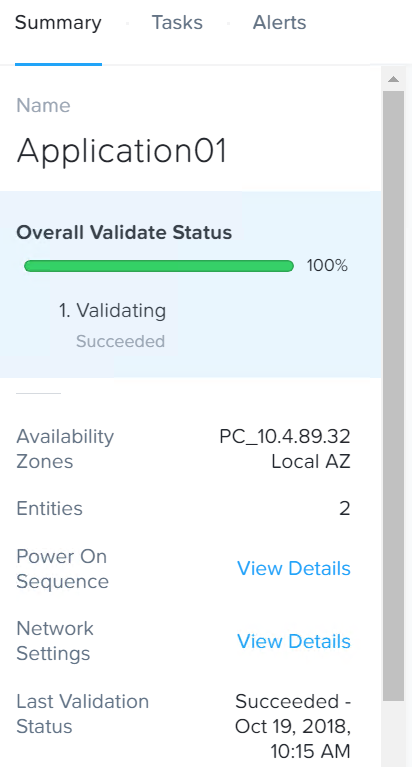
Validation report
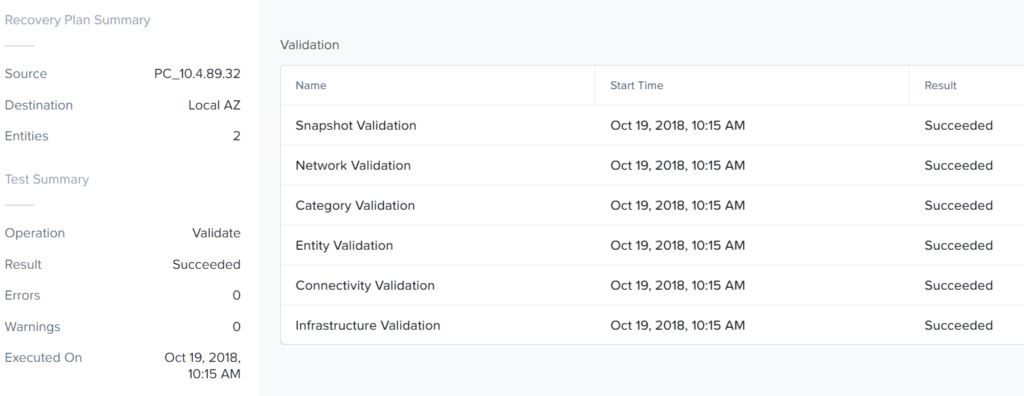
Validation report details
Test failover with Nutanix DR orchestration
Test failover is a great feature which helps enterprises perform and validate full failover without affecting production workloads. During test failover copies, of the workloads which are part of the recovery plan, will be created on DR site and connected to the test network, In next step, following boot order specified in the recovery plan, VMs will be powered on DR site.
At the end of the test failover workflow, you will have fully running VMs, connected to an isolated network on DR site ready to be checked.
Initiate a failover test plan from Prism Central at the recovery site.
Choose recovery plan you want to perform test failover and from Action button choose Test. The system will create VMs on DR site from the latest snapshot and connect them to test network specified in a recovery plan. VM names will have a prefix Nutanix-Test-<VM_name>.
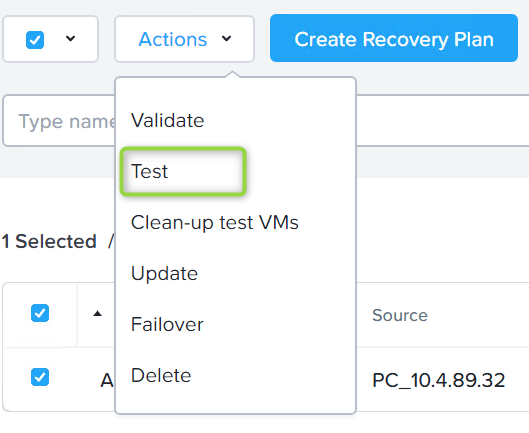
Failover test
Failover test takes a few minutes to complete. When it is done, you can see the report. An example is below.
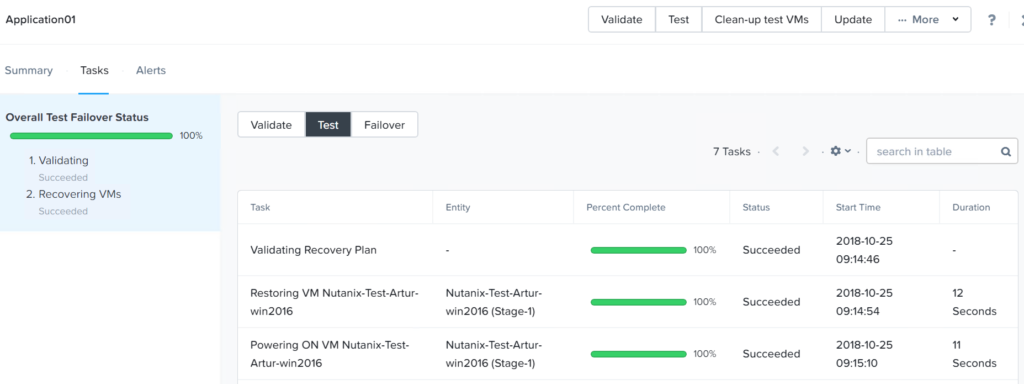
Failover test report in Nutanix DR orchestration
When you are done with testing, let the system to clean up after a test. From the same place, as you initiated test failover, this time choose Clean-up Test Vms.
Video – test failover using Nutanix DR runbooks


